Replacing my fireplace - more destruction!
Handyman Quotes
from local handymen

As I’d found the original Victorian hearth tiles under the horrible laminate flooring I decided that the only thing that would do in the living room was an original Victorian fireplace. Fortunately there are loads of reclamation yards round here, where reconditioned fireplaces can be bought fairly cheaply. I picked up a beautiful reconditioned horseshoe fireplace, which would originally been a bedroom fire, with an unfinished surround for $400. Usually the fireplace itself is relatively cheap but to get a good surround or mantlepiece you'll usually have to pay a bit more. One of my friends swears that e-bay is the way forward for old fireplaces, and if you want to recondition one yourself there are lots of guides on-line showing how it’s done. I decided that I had quite enough work on my hands as it was and that I could leave reconditioning the fireplaces to the professionals.
The chimneybreast behind the old fireplace had been blocked up to fit the previous fireplace and obviously needed to be opened up before the new fireplace could be fitted (Chimneybreast is the term for the part of a wall in a room which is built out round a chimney - the bit that pokes out). I started by measuring the width of the chimneybreast and marking out the centre point. I then measured the height of the back of the fireplace and marked this onto the wall. Once I’d drawn out a square the size of the back of fireplace (that is to say the part of the back of the fireplace that protrudes, not the entire size of the fireplace as the edges will want to sit flush to the walls once it’s installed) I set about cutting into the wall.
The original fireplace had been closed up with breezeblocks, and I checked that I was not about start cutting into the actual chimneystack or any lintels. As I had picked out a fairly small fireplace I was confident that it wasn’t going to go wrong. I’d also had the roofers check out the state of the chimney when they’d been working on the house earlier in the month, so I was fairly sure I was good to go. I decided to use a hand held chisel this time, rather than the air chisel and I remembered to lay dustsheets before I got to work.
Using the lines I’d marked out earlier I started cutting through the wall into the cavity beyond. This was actually surprisingly easy, and I was really pleased to see that the hearth tiles extended beyond the existing wall into the old fireplace, so I wouldn’t have to worry about matching them later on.
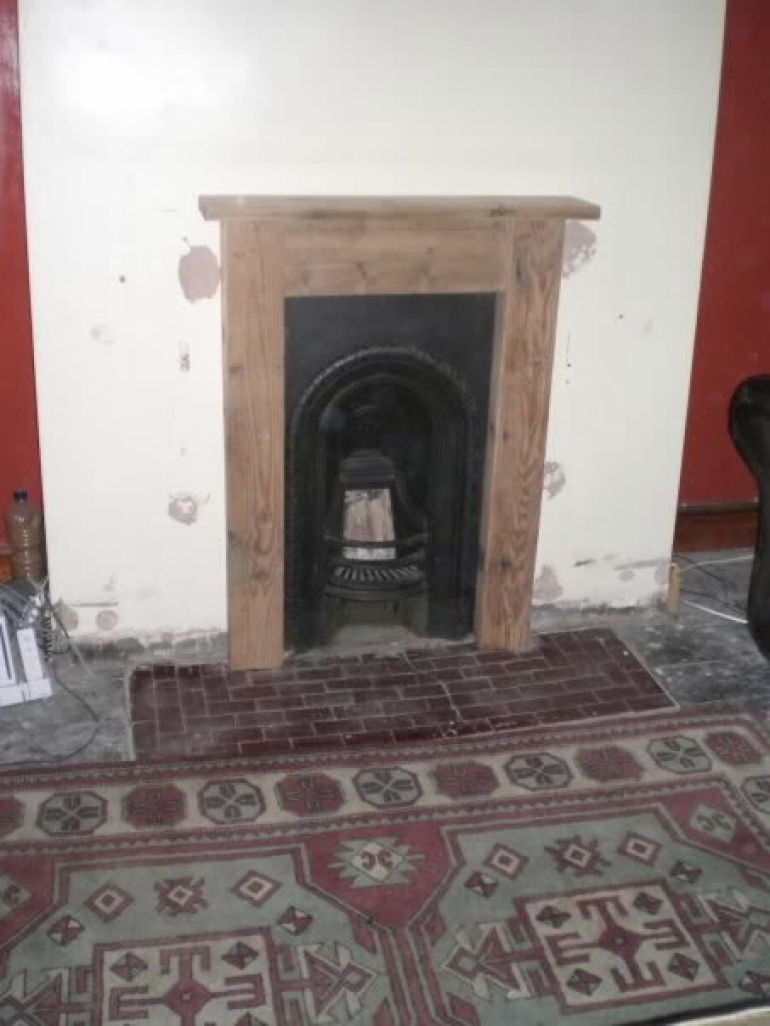
I cleared the rubble from the fireplace and manoeuvred the fireplace into place; I needed to tidy up a few edges for it to fit properly, but I figured that it was better to cut too small rather than too big. You can always take a bit more away, but putting a wall back seems a bit harder!
Once the fireplace was set into the wall, I needed to cement it into place around the base, and screw the top corners to the wall. Mixing the cement by hand was hard work, but once I had the consistency right I found it remarkably easy to trowel it into position, round the base of the fireplace and get the finish smooth.
Fixing the surround was the easiest bit. I’d read up a lot about using fixings like French cleats for it, but I decided in the end, given the rough finish I’d chosen for the surround, that a couple of large woodscrews would do the job just as well. So I drilled countersunk holes at the bottom of each side and on each side of the top cross bar, set some rawl plugs into the wall and attached the surround that way. I am really, really pleased with how it’s come out. Obviously it’s only going to be decorative for the moment, but there’s no reason why (when the chimneys have been uncapped) that it won’t work perfectly.
Anyway, let me know what you think of my handywork – this is one of the projects that I have taken photos of! You can also see the horrible, red, shiny vinyl paint that I’ve been living with in a one of the pictures, not to mention the lovely orange skirting boards, if you look closely. The hearth tiles still need a really good clean, but I am confident that I can get them looking much better than they do now.
Handyman Quotes
from local handymen
![]()